This is going to be my first year homeschooling more than one child. J is starting kindergarten/grade 1 and L is going into grade 7. Plus I have a 2 yr old and 2 babies, so I REALLY needed something to keep my younger ones occupied (and learning) while I am working with my oldest.
My friend, Sharla, just happened to bless me with some busy bags she had made since she had extras...and we LOVE them!
A busy bag is an activity that is stored in a large ziplock bag and has everything in that bag that the child will need for that activity. I store all my bags in a box and pull one out when I need one. You give the bag to your child and THEY DON'T HAVE TO ASK YOU FOR ANYTHING in order to do that activity. They are learning and having fun and staying out of trouble! And when they are done, everything goes back in the bag for next time. Sounds great to me :) Most of these are multiple time use, and a few are one time use. So I am going to share the ones that I've made so far along with a brief description and which ones we like best. (I'm in the process of making more, so I'll do another post on this soon!
Bug Catcher Kit - 2 clear plastic cups (Dollarama pack of 8 was $1), screen door mesh (had some on hand), rubber bands to hold on the mesh, a magnifying glass (had that on hand, too), notebook for documenting or drawing what you catch, and a pen.
Pom Pom Sorting - ice cube tray, plastic tweezers (you might be able to get these at Michaels),
assorted size and color pom poms. Child can size sort, color sort, etc. Great fine motor activity. Daisy LOVES this one!
Snowflake Patterns - Any color felt or foam for the background, snowflake cards, and snowflake shapes cut out of foam or felt. (Felt is more fun to cut) Then see if you can make a snowflake to match the one on the card or just make your own. Click
Here for the printable cards and shapes.
Water Painting. This one is super easy. Plastic cup, different sizes of paint brushes. Just add water and let them paint the deck or the sidewalk or rocks or whatever!
Geoboard Pictures. Geoboard ($5.99 at Education Station) and elastics (we got a large bag of them at Dollarama for $1). You can make shapes or designs or pictures....use your imagination!
Alphabet Sound Matchup - this one is my favorite. What you need: the alphabet (we used foam letters from the dollar store, but you could use letter magnets or just print off the letters of the alphabet on cardstock and cut and protect them with clear contact paper), and an object from around the house that begins with each letter of the alphabet. Then pick a letter and find the object that starts with that letter and match them up!
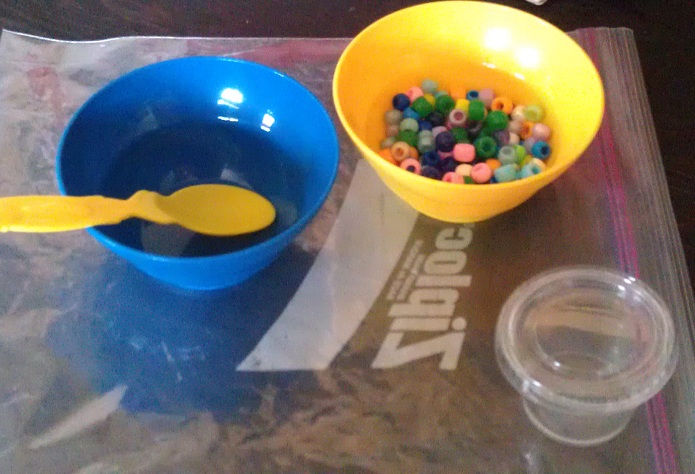
Bead Sorting - 2 bowls, a plastic spoon, and some beads (or other small objects). Color sort or just spoon the beads back and forth. I suggest using a tray under this activity (or a cake pan) so that the beads don't go everywhere if they are spilled.
Counting Tiles - I had these foam letters left over from the alphabet set I bought and I had a bamboo placemat (also from Dollarama) that I cut up. I put the numbers 0-9 in the bag and 45 tiles.
Painting - small canvas (set of 2 Dollarama $1), brushes, paints, and an art palette (dollarama $1)
I need to add a plastic cup for water to this bag.
Sponge painting - Sponges from the Dollarama (pk of 6 for $1), tempera paints in containers (got these at the dollarstore, too), I still need to add the smock, paper, and plastic table cloth ($1 - Dollarama) to this one, but it wouldn't fit in the bag so I need to use an extra large ziplock bag instead of the large.
Color Matching - this one is so fun! All you need are paint chips and clothes pins and glue. You can either grab 2 of each paintchip (to have the extras to make the hearts out of) or you can cut your paint chips in half to make the hearts.
The kids love this one. Beads and Pipe Cleaners. They love that the beads are stars and that they don't fall off the pipe cleaners.
Necklace Making - Plastic string, Buttons, straws, whatever you have on hand.
Plate Sewing - plastic needles, yarn or string, foam plate. (I'm not sure where to get the needles, because my friend put this one together but I think maybe Michaels would have them)
Hang up Your Clothes! Clothing shapes cut out of different colors of felt or cloth, string, and clothes pins. Tie the string between to chairs and hang up your clothes :)
Not sure what this is called, but it's tiny foam balls - the kids like it, so I decided to make it a busy bag.
Paint chips and Paperclips - learn to put the paper clips on the paint chips or link the paper clips or whatever.
Lacing Shapes - Foam to make the shapes, a hole punch, and some plastic lace (or a shoelace). You could add numbers or letters and make this a dot to dot, too.
Popsicle Stick Puppets - Popsicle sticks and foam animal stickers.
Notebook and Stickers. I have a ton of extra stickers (REALLY cheap at the dollar store) to put in the bag when these run out.
Wide Popsicle Stick Puzzle - popsicle sticks, picture and glue/or draw a picture on the sticks.
There are many more to come, but these are what we have so far. I am so excited about our schoolyear! I'm gonna go play now, bye!